
All bosses in How to Fish, from the Spider Crab first boss to the final whale: exact HP, escape timers, summon bait and what patch 1.0.12 changed.
How to Fish Boss Guide: All Bosses, First Boss to Final Whale
Every boss in How to Fish follows one hidden rule set, and once you see it the fights stop being walls and become checkpoints. Kill the boss, keep its uniquely named drop, hand it to the NPC who sent you. Miss the hand-in — or worse, sell the trophy — and progression freezes with no warning. This guide covers all five fights in unlock order.
The Rules Every Boss Shares
- The white bar under a boss's health is an escape timer. Drain it by dealing damage; if it empties first, the boss flees and you redo the summon from scratch.
- Most bosses have a self-stun punish window — bait an attack, sidestep, hit during the recovery.
- The trophy matters more than the kill. Shells, tails, heads and skeletons are quest items. Ordinary meat never advances the story.
- Weapon upgrades beat player skill past Island 2. Fights get dramatically easier with each correct purchase.
Boss HP and Damage Stats (Exact Numbers)
The game never shows you a boss health bar number — it just drains. The files do show it. Here is every boss-tier creature with its exact HP pool, contact damage and escape timer:
| Boss | Max HP | Contact Damage | Escape Timer |
|---|---|---|---|
| Spider Crab | 750 | — | 180 s |
| Giant Piranha | 2,500 | 32 | 300 s |
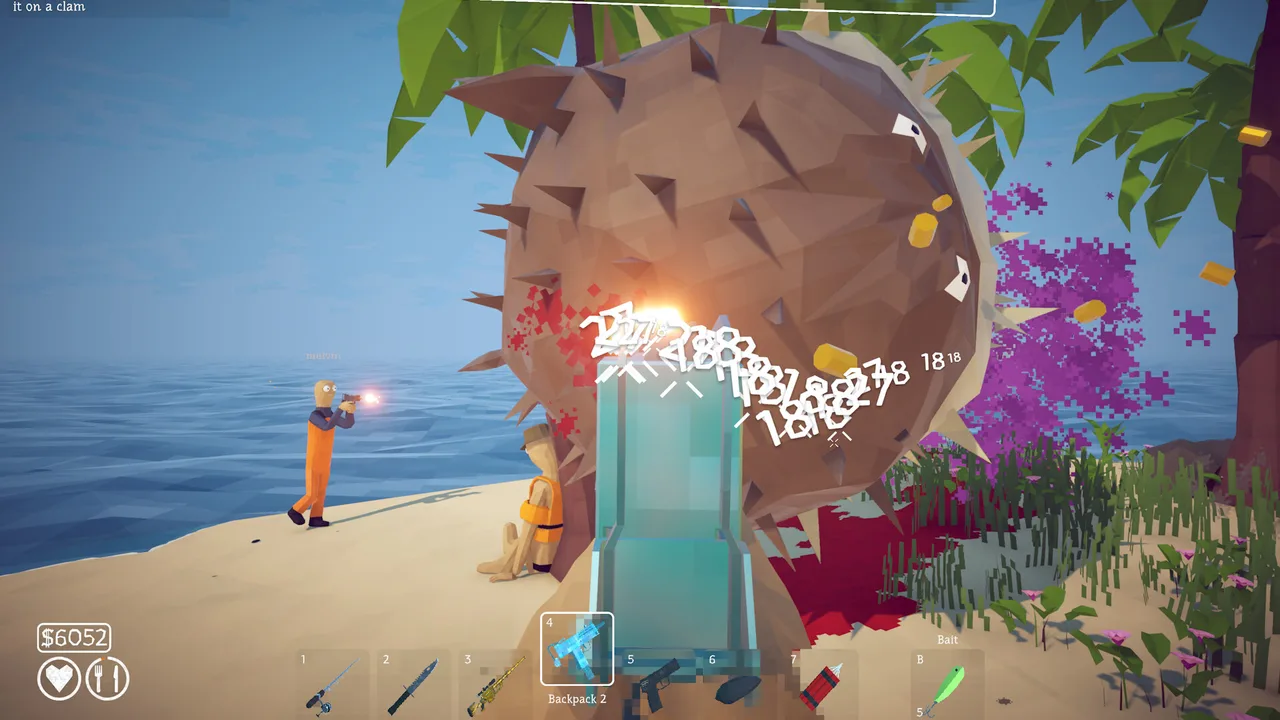
| Pufferfish | 18,000 | 34 | 300 s |
| Albatross (the Bird) | 7,800 | — | 300 s |
| Mutated Bowhead Whale | 38,000 | 36 | 300 s |
Side bosses that patrol open water (fightable before or between story targets) run on the same system: Blue Shark 2,300 HP, The Old Pike 1,000 HP, Sunfish 1,500 HP, Tuna 6,000 HP (40 contact damage), Goblin Shark 7,500 HP (25 contact damage), Bowhead Whale 20,000 HP (28 contact damage).
All 12 Boss-Tier Creatures (Full HP Table)
Those five are the story chain. The game also carries seven boss-tier fights that sit outside the quest line — summonable encounters that patrol open water or hide behind a bait purchase. Here is the complete list, sorted by health, with the summon item that pulls each one:
| Boss | Max HP | Contact Damage | Where It Shows Up / Summon |
|---|---|---|---|
| Spider Crab | 750 | — | Lighthouse, first boss — Empty Beer Can ($8) |
| The Old Pike | 1,000 | 25 | Open water — Beginner Boss Lure ($40) |
| Sunfish | 1,500 | — | Open water — Beginner Boss Lure ($40) |
| Bing Bong | 2,000 | 75 | Island 3 hidden boss — Coconut ($350) |
| Blue Shark | 2,300 | 36 | Desert waters — Standard Boss Lure ($280) |
| Giant Piranha | 2,500 | 32 | Forest, Island 2 story boss — Leech Bait ($1) |
| Tuna | 6,000 | 40 | Mid and late open water — Professional Boss Lure ($1,200) |
| Goblin Shark | 7,500 | 25 | Deep water — Scientific Boss Lure ($5,800) |
| Albatross (the Bird) | 7,800 | — | Rocks, Island 4 story boss |
| Pufferfish | 18,000 | 34 | Desert, Island 3 story boss — Carrot ($100) |
| Bowhead Whale | 20,000 | 28 | Open ocean — Fish Bucket |
| Mutated Bowhead Whale | 38,000 | 36 | Military Volcano finale |
Three planning numbers fall straight out of these tables:
- Bing Bong hits harder than the final boss. 75 contact damage on a 2,000 HP body — more than double the whale's 36 — which is why melee loses that fight outright. The Bing Bong guide covers the ranged-only approach.
- The Pufferfish is the real mid-game wall. At 18,000 HP it has more than seven times the Giant Piranha's pool — arriving with an unupgraded SMG (24 damage per shot) means 750+ hits. The Goblin Shark at 7,500 HP is the step just before it, so Desert squads climb a 2.4x health jump inside one island. Upgrade the gun's damage ladder before summoning.
- The final whale's 38,000 HP explains the $20,000 assault rifle requirement. A maxed sniper deals 500 per shot; even that is 76 perfect shots against a 300-second timer.
The escape timers are data-confirmed too: story bosses give you 300 seconds, the faster mid-tier encounters only 180. Slow, careful play loses Spider Crab-type fights to the white bar, not to the crab.
Patch 1.0.12: What Changed for Boss Fights
Patch 1.0.12 landed on September 4, 2026 and is still the newest build as of September 22. Three of its changes touch boss fights directly:
| 1.0.12 change | What it means in practice |
|---|---|
| Piranha rebalanced | The Giant Piranha encounter was retuned. The official notes say "rebalanced" and publish no before/after values, so the 2,500 HP and 32 contact damage in the table above are the pre-patch figures. Re-test your damage math instead of trusting older breakpoints. |
| Tuna slightly nerfed | The Tuna side boss (6,000 HP, 40 contact damage) came down a notch — again, with no numbers attached. If the Professional Boss Lure fight felt unfair before September 4, it is worth another attempt. |
| Final boss tail hittable by explosives | The Mutated Bowhead Whale can now be damaged by explosives while its tail is coming down. That is a new, cheap damage window: a $25 dynamite stick deals 200 explosion damage, which is throwaway chip damage against a 38,000 HP pool and far cheaper than assault rifle ammo. |
Two caveats before you rebuild a loadout around this:
- The nerf sizes are unverified. The notes confirm what changed, not how much. Community testing is the only source for magnitude right now, and it is not settled.
- Explosives still kill you. Since 1.0.11 your own dynamite kills you even with friendly fire switched off. A tail-window throw has to clear your own position and your co-op partners' — see the dynamite guide for the throwing mechanics.
Do not rebuild your build around unverified nerf numbers. The HP table above stays the safest planning baseline until Dazed Games publishes figures or the community agrees on measured kill times.
Official source: How to Fish patch 1.0.12 notes — "Rebalanced piranha", a small Tuna nerf, and the final boss tail now taking explosive damage, published September 4, 2026. The same notes call 1.0.12 "most likely the last bugfix patch" before content work starts, so no further boss tuning has been announced.
Official source: How to Fish on Steam — the store listing (app id 4001890) is the reference point for the game's own version history; every HP and damage value in this guide is read from the shipped game files.
Spider Crab — Lighthouse (First Boss)
Summon: Feed a Beer Can to the Lighthouse Keeper, take the empty can, use it as a lure. Loadout: Max-sharpened knife or brass knuckles — no gun needed. The fight: The crab charges straight at you. Its full health pool is only 750, so three to four clean punish windows end it outright. Sidestep as it commits; when it misses it stuns itself, leaving a window for two to four hits (three is comfortable). Reposition, repeat. Reward: Hand the result to the keeper for the boat keys.
Don't let the crab knock you far from the fight area — chasing it back wastes the white-bar timer faster than any mistake in the actual exchange.
Giant Piranha — Forest (Island 2)
Loadout: Shotgun ($150), whose upgraded pellet damage shreds its 2,500 HP approach after the jump. Melee stops being viable here; this fight exists to teach that. The fight: Straightforward with the shotgun — keep distance, unload on approach windows (it deals 32 contact damage on hit), back off when it commits. Without the shotgun this becomes a painful war of attrition, which is why the $150 purchase gates most players' progress more than any mechanic. Patch 1.0.12 rebalanced this encounter; the patch section above explains what that does and does not tell you. Reward: The piranha's drop unlocks the Island 3 coordinates at hand-in.
Pufferfish — Desert (Island 3)
Loadout: SMG ($650) with a compensator or suppressor fitted — bare automatic recoil wastes more ammo than the fight costs. The fight: The pufferfish punishes greedy DPS windows. Respect its inflate cycle, dump damage during deflation, and keep your positioning mobile — at 18,000 HP with a 34-damage contact hit, greedy DPS windows cost more than any other fight in the game. Islands 3 creatures soak far more damage than anything prior — expect longer fights than the Forest. Reward: The pufferfish tail opens Island 4.
The Bird Fight — Rocks (Island 4)
Loadout: Sniper Rifle. This encounter is built for precision. The fight: Targets move vertically, which neutralizes spray weapons. Lead your shots, use the terrain for sightlines, and lean into trick shots — mid-air kills carry the game's largest value multipliers, so this fight doubles as a money showcase. Reward: The bird head buys the Volcano radar coordinates.
Mutated Bowhead Whale — Military Volcano (Final Boss)
Community naming varies — lava whale, magma whale, Mutated Bowhead Whale — but it is one encounter: the finale. Loadout: Assault Rifle ($20,000), fully attached. This is non-negotiable; partial upgrades extend the fight toward the white bar's limit. The fight: Everything you have practiced — punish windows, positioning, attachment-managed recoil — at maximum pressure. The finale has one extra step: after the kill you deliver the whale into the volcano itself. Patch 1.0.12 also made its descending tail vulnerable to explosives, which turns each tail drop into a free dynamite window during the fight. Reward: Credits, plus an achievement for reaching this point within roughly an hour of starting.
Trophy Hand-In Cheat Sheet
| Boss | Trophy | Hands In To | Unlocks |
|---|---|---|---|
| Spider Crab | Shell/meat | Lighthouse Keeper | Boat keys |
| Giant Piranha | Piranha drop | Quest NPC | Island 3 coordinates |
| Pufferfish | Tail (endangered flag in files — always hand in, never sell) | Quest NPC | Island 4 |
| Giant Bird | Head | Quest NPC | Volcano radar coords |
| Bowhead Whale | The whale itself | The volcano | Story finale |
Sold a trophy before hand-in? The chain is broken until you re-farm that boss. Check your inventory against this table whenever progress stalls. The Pufferfish tail is the one to watch: the game flags it as an endangered creature, so treat every endangered drop as a quest item and never vendor it. Full list of the nine flagged creatures in our endangered species guide.
Preparing for a Boss Attempt
Every failed attempt costs lures, ammo and time — thirty seconds of preparation beats a re-summon:
- Full ammo stock for your primary plus a backup weapon
- A sharpened melee fallback — if you run dry mid-fight, the knife buys back breathing room
- Open space — most bosses punish fighting with your back against terrain
- The summon item ready (the Spider Crab's Beer Can is the template; later islands use their own triggers)
In co-op, agree on roles before the pull: one player baits and dodges while another unloads from safety. Shared-wallet crews should also pre-agree who replaces spent ammo — post-boss arguments are real.
The Escape Timer, Explained
The white bar under boss health drains constantly during the fight. Three things matter about it:
- It rewards burst damage over caution — slow, safe play can lose fights you were winning
- It does not pause when you reposition, so plan movement between punish windows instead of during them
- If it empties, the boss escapes and resets to full health — there is no partial progress
Speedrunners exploit this system deliberately: the one-hour final-boss achievement exists because an optimized route skips side content and hits each boss with exactly enough firepower before any timer becomes a threat.
Re-summoning After a Failure
Bosses are repeatable. The summon sequence is the same each time — return to the quest NPC, reacquire the trigger item, and bait the encounter again. Nothing is permanently missable, which is worth remembering if you sold a trophy or lost a fight badly: the chain bends, it does not break.
Co-op Boss Fights: Division of Labor
Bosses scale for the lobby you bring — up to eight players since patch 1.0.4 — but uncoordinated crews often fight worse than a solo player. The pattern that works:
- The baiter draws charges and holds the boss's facing — this player needs movement practice more than firepower
- The damage pair unloads during punish windows from opposite flanks, so no single dodge covers both
- The support handles revives, ammo handoffs and lure resupply between phases
Shared-wallet note: decide before the fight who buys replacement ammo. Nothing ends a session faster than discovering the group's entire profit just became one person's new SMG.
Reading Boss Animations
Every boss telegraphs its attacks the same way, and learning the tells transfers across all five fights:
- A wind-up pause means a committed charge — sidestep late, punish early
- A hop or reposition means spacing is about to change; reset your distance instead of chasing
- Repeated short movements are stall behavior — the white bar is draining while you wait, so force an exchange
Destructoid's walkthrough makes the same observation about the Spider Crab that applies to every later boss: patience during wind-ups and greed during stuns is the entire combat system.
Boss Guides and the Tools to Beat Them
Every boss on this page has a dedicated deep-dive: the Spider Crab, Giant Piranha, Pufferfish, Terrorizing Bird and the Magma Whale. Before you go in, the weapons unlock guide tells you what firepower each island can actually give you, and the best weapon guide ranks which gun is worth taking into each fight. If you would rather watch a route before running it, the Steam Community guides hub carries player-recorded runs for most encounters.
FAQ
How many bosses are in How to Fish?
Five story bosses across five islands, ending with the volcano whale. Behind them sit seven more boss-tier creatures — The Old Pike, Sunfish, Bing Bong, Blue Shark, Tuna, Goblin Shark and the Bowhead Whale — for twelve summonable boss fights in total.
What is the white bar under boss health?
An escape timer. If it empties before you finish the kill, the boss leaves and must be re-summoned.
Can bosses be beaten without guns?
Only the Spider Crab realistically — everything from the Giant Piranha onward assumes firearm loadouts. Bing Bong is the hardest melee refusal in the game: 75 contact damage on a 2,000 HP body that never stops moving.
Which boss should I fight first?
The Spider Crab at the Lighthouse — it is the story's first boss, it dies to a sharpened knife, and its drop is the boat-key hand-in that opens the rest of the map. Everything else assumes you have already bought a gun.
Related Guides
Four pages pair with this one: the flagged-creature list, the gun rankings, the unlock order, and the cheap explosive that now works on the final boss tail.
More How to Fish Guides
Forest Island guide: the five-leech quest and special bait, where guns unlock, the girl's big yummy fish, and the Giant Piranha fight.
Every island in How to Fish in unlock order — Lighthouse, Forest, Desert, Rocks, Military Volcano — with the boss trophies that gate each one.
How to Fish casino guide: the Island 4 Lucky Bait roulette, why green 35x returns less than red 2x, the All In achievement, and Reel of Fortune skins.
Cooking in How to Fish multiplies an item value by 1.5x and burning it cuts value to 0.1x. Grill unlock, the full formula, magma cooking and burnt sales.
How to make money fast in How to Fish: early clam loops, the shotgun pipeline, cooking multipliers, dynamite farming and the $20,000 rifle fund.
How to Fish upgrade priority: weapon damage first, then inventory slots and the $10 radar, with real tier costs from the game files and what to skip.
Complete How to Fish walkthrough for all five islands: the Spider Crab, Giant Piranha, Pufferfish, bird fight and the volcano whale, with every NPC hand-in.
Lighthouse Island guide: clam economy, the $3 rod, knife sharpening prices, the Beer Can quest and beating the Spider Crab for boat keys.