
The best How to Fish tips: read ripples first, never sell boss trophies, buy the $10 radar early, style kills for multipliers, cook everything you sell.
How to Fish Tips and Tricks: What the Game Won't Tell You
How to Fish explains almost nothing. The tutorial covers throwing clams at a lighthouse keeper, and after that you are on your own with a physics engine, five islands and a shared wallet. These fifteen tips compress what launch-week players learned expensively — most of them cost somebody a boss re-fight or an assault-rifle delay to discover.
Economy Tips
1. The Loop Is Catch → Kill → Multiply → Sell
Fishing is delivery; killing is processing; selling is payday. Every system — trick shots, cooking — exists to inflate the multiply step. Players who skip straight from hook to shop earn half of what they should.
2. Read Ripples Before Casting
White ripples hold commons, blue holds uncommons, gold and orange hold rare and legendary bodies. Casting blind into unrippled water produces exactly the fish that water defaults to. Two minutes of shoreline reading beats twenty minutes of hopeful casting.
3. Never Sell Uniquely Named Drops
Shells, tails, heads, skeletons — proper nouns are quest keys until an NPC confirms otherwise. Islands unlock through trophy hand-ins, not kills. This is the single most repeated tip in every guide because it is the single most common progression freeze. If you have lost track of which NPC wants what, the quests and missions guide keeps the hand-in table.
Sold trophy = re-summoned boss = re-farmed kill. Hold everything suspicious.
4. Cook Everything From Island 3 Onward
Grill access (earned via the Desert shark quest) multiplies sale value by exactly 1.5× at perfect doneness. Raw-selling after that point is a voluntary pay cut — and burning the meat is worse than raw: burnt catches collapse to 0.1×, a 90% loss on the transaction.
5. Trick Shots Are Income, Not Ego
Mid-air kills and 360 finishes stack value multipliers on whatever you sell. The Sniper Rifle tier pays biggest. Practice on cheap bodies, profit on valuable ones. The trick shots and Killscore guide works out which multipliers actually stack.
Combat Tips
6. The White Bar Is a Timer
Every boss health pool has one underneath it. It drains constantly; empty it first or the boss escapes and resets. Burst damage during windows beats cautious poking in every fight in the game.
7. Bait the Charge, Punish the Stun
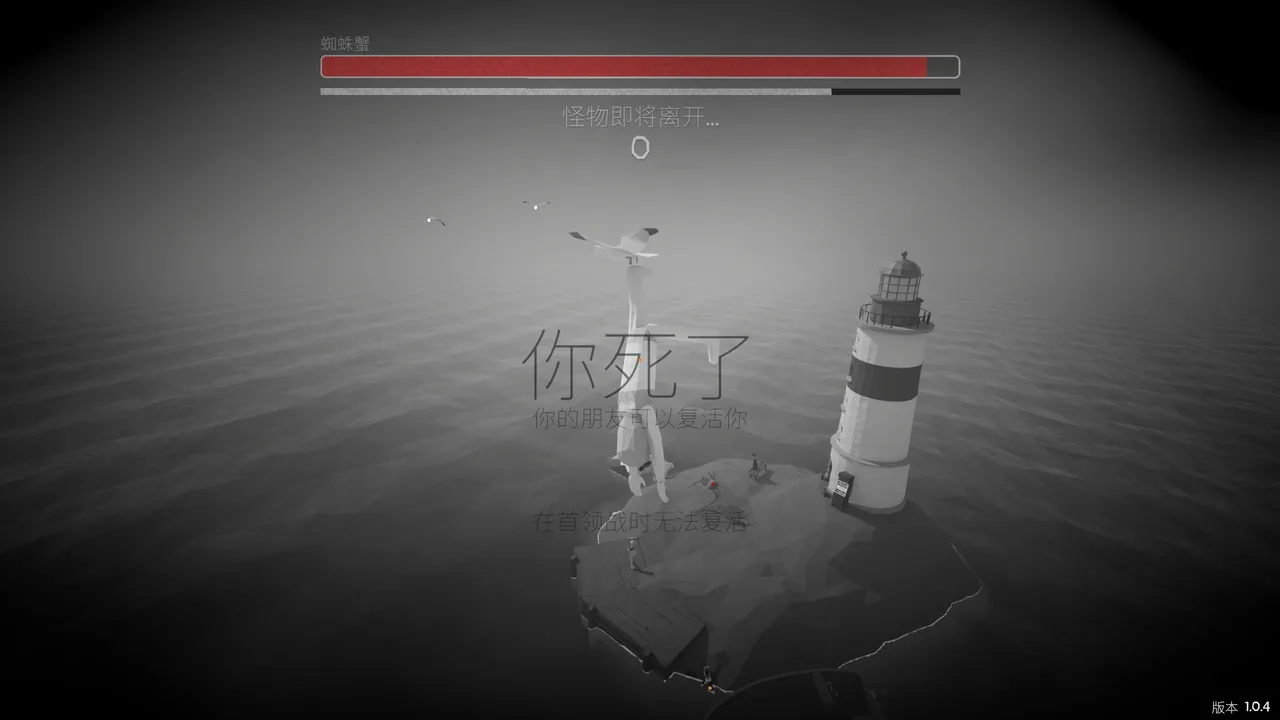
The Spider Crab teaches it: let bosses commit attacks, sidestep late, punish the self-stun window two to four hits deep, retreat. The pattern repeats — scaled up — through all five fights.
8. Buy Weapons Before Boats
A faster boat reaches poverty sooner. The community-tested order: radar → shotgun → SMG + attachments → assault rifle fund → then comfort parts.
9. Skip the Pistol Entirely
The data agrees with the community here: a $50 pistol starts at just 25 damage, and its final damage tier alone costs $9,100 to reach the 160 ceiling — money that buys you into Sniper Rifle territory instead. The $150 shotgun outclasses it from the first island. There is no normal-run scenario where the pistol wins. Full damage ladders per weapon are in the weapons unlock guide.
10. Attachments Beat Raw Damage
Recoil control keeps shots on target; extended magazines survive long phases. Fit stability pieces before any boss fight with automatics.
Survival Tips
11. Eat Before Boss Fights
Hunger quietly degrades health regen and fight endurance. A pre-summon clam is free insurance; entering hungry converts survivable hits into run-enders.
12. Keep Cooked Food on the Ground During Fights
Mid-fight healing without shop detours. The Pufferfish and whale fights especially reward a prepared picnic line.
13. Dynamite Clears Clusters, Not Bosses
$25 buys a 200-damage blast — instant shallow-water volume or an emergency phase reset. It does not replace gun DPS against tank health pools like the Pufferfish's 18,000.
14. Talk to Every NPC After Every Kill
Hand-in targets rarely announce themselves loudly. Progression stalls nine times out of ten because an NPC is waiting on something already rotting in your inventory.
15. In Co-op, Agree Purchases First
Four players share one wallet. Assign a buyer, set priorities, and nobody's assault-rifle fund dies funding someone's boredom pistol.
Three Tips Most Players Learn Too Late
The fifteen above pay off from hour one. These three tend to surface on a second run, usually right after a specific and avoidable mistake.
16. The Radar Is Lying on the Ground Beside the Keeper
The $10 radar is not a shop purchase — it is a ground pickup sitting next to the lighthouse keeper on Island 1, and a surprising number of players finish the starting island without ever noticing it. NPC coordinates are useless text until the radar is equipped, so anyone who misses it spends the next few hours wondering why quest destinations never show up. Grab it, equip it before every sail, and mount it permanently on the boat as soon as that upgrade appears. The radar and coordinates guide covers the whole navigation chain, and the boat upgrades guide explains when the permanent mount earns its price.
17. Every Non-Boss Lure Can Snap Off the Line
The tutorial never mentions this, and it quietly changes what bait actually costs. Regular lures are consumed on a percentage chance when something bites — Hot Dog 40%, Beginner 35%, Standard 30%, Professional 25%, Scientific 20% — so one purchase survives several casts and the real cost per cast is the shelf price multiplied by that chance. Boss baits are the opposite: every boss lure is consumed on every single attempt, with no amortisation at all. A $280 Standard Boss Lure costs $280 whether the Blue Shark shows up or not. Never buy a boss lure you cannot afford to lose outright. The bait guide carries the full durability table and the per-session arithmetic.
18. Weapons and Tools Get Cooked Too, and Water Fixes It
Cooking is not restricted to fish. Weapons and tools are items, and items left on a grill go through the same cooking states — so a gun parked beside your cooking rack can come back marked as cooked and worth less than clean gear. Patch 1.0.10 added the escape hatch: take the weapon or tool into water and the cooked state washes off. The habit is simple. Never store your loadout on the grill rack, and if a gun comes back from a session smelling like dinner, dunk it before you sell or upgrade anything.
Official source: How to Fish patch notes on Steam — the 1.0.10 entry is where the weapon-and-tool wash mechanic was added and the 1.0.11 entry documents the option changes. Shop prices and the item list are on the official store page, with build history tracked at SteamDB.
Putting the Tips Into a Route
Fifteen tips collapse into one opening checklist:
- Clams → keeper → $3 rod → knife sharpenings → Hotdog Lures
- Radar ($10) before first sail — it sits next to the keeper, unannounced
- Beer Can quest → Spider Crab → boat keys
- Forest: leech quest, shotgun purchase, Giant Piranha down
- Desert: shark feast (grill access), endangered fish (carrot bait), SMG fitted
- Rocks: tuna offering, Sniper Rifle, bird down
- Volcano: assault rifle fully attached, whale delivered, credits roll
Each step feeds the next — bait from quests hooks bosses, bosses fund weapons, weapons shorten fights. The tips matter most at the seams between steps, where selling a trophy or skipping a shop costs a full loop's momentum.
Which Tips Matter Most for Co-op Crews?
Three scale directly with headcount. Shared-wallet discipline (tip fifteen) prevents the classic group poverty spiral. Role-split boss tactics (tip seven's punish windows) turn four-player fights into clean rotations. And cooked-food staging (tip twelve) becomes logistics — someone owns the picnic line, or mid-fight healing evaporates exactly when the Pufferfish starts rolling.
Solo players can ignore coordination entirely and still finish; that is the mark of a well-balanced list. Every tip above bends toward making either mode faster, richer or funnier.
The Meta-Tip: How to Fish Rewards Attention
Step back from the fifteen tips and one pattern generates all of them: the game hides systems in plain sight and rewards players who look. Ripples telegraph rarity; NPC dialogue telegraphs quest chains; the radar sits visibly beside the keeper; boss health bars print their escape timers in white. Nothing requires datamining or luck — only reading what the screen already shows.
Players who internalize that habit out-earn and out-progress players following any tip list, including this one. When something feels off — progression stalled, money thin, fights unwinnable — the answer is almost always visible somewhere you stopped looking. Check the water, check the dialogue, check the inventory, then check the shop.
And when all four fail? That is what co-op is for: someone else has usually noticed what you missed, and telling you about it mid-catastrophe is half the game's comedy.
Tips Connect to the Deep Guides
These tips are the shortcuts; the deep guides are the why. The money farming guide expands the economy tips into full strategies, the bait guide covers every lure tier in detail, and the boss guide turns the combat tips into fight plans.
FAQ
What is the single most important tip?
Never sell uniquely named drops. Progression runs through trophy hand-ins, and the game gives no warning when you sell a key.
How do I make money fast early?
Clams to the keeper, shallow catches on free lures, knife sharpenings, then Hotdog Lures for bigger bodies. The radar ($10) and shotgun ($150) are the spending priorities.
Do I need to play co-op?
No — solo works completely. Co-op adds chaos and speed; solo offers control. Both finish all five islands.
Can you speedrun How to Fish?
Yes, and the structure rewards it: the entire campaign is one boss-trigger chain, so a speedrun is mostly route discipline rather than execution tricks. The skeleton — kill the island boss, hand its trophy to the right NPC, buy the next island's unlock — maps directly onto the walkthrough's progression order. Three habits cut hours off a run: skip every optional weapon tier between the shotgun and your boss-killer of choice, keep cooked food pre-stacked before sailing instead of cooking mid-run, and never detour for rare fish variants on a first pass — they are money, not progression. Solo runs beat co-op for pace since the shared wallet stops eight shoppers from draining it. Patch 1.0.9's Easy mode (creatures take 25% more damage from nothing you did) is the closest thing the game has to an official speedrun setting.
More How to Fish Guides
Guide to How to Fish achievements: 360 No Scope, Terrorizing Bird, the one-hour speedrun and a two-run structure for completing every family efficiently.
Every fish location in How to Fish: all 54 creatures by island and water depth, bait matching, ripple colors and the nine endangered species.
Every quest chain in How to Fish: clam economy, Beer Can summon, leech delivery, shark feast, endangered fish, tuna offering and the Scientist volcano finale.
Every bait and lure in How to Fish: the free starter, $1 Hotdog Lures, Grubs, Heavy Metal, river and swamp specialty lures and boss lures with tier matching.
How to find and beat Bing Bong, the secret boss on Island 3: the $350 coconut summon, ranged-only fight, and what it drops.
Boat upgrades in How to Fish explained: engine and storage parts, the permanent radar mount, why boats come last in purchase orders and when speed pays off.
How to Fish has no console build, so there is nothing to cross: Steam PC, Deck and GeForce NOW players share the same 8-player lobbies. Co-op facts for 2026.
Desert Island guide: the grill master's shark, the tourist's endangered creature, SMG attachment shopping, and beating the Pufferfish.